Thursday, July 21, 2016

Change is coming

Don't be afraid of change.
You may lose something good,
But you may gain something better.
It is a time of great change for the three of us at McKay Manor Musers, both personally and with our little business. A few years ago we had a developer create our website, but now that developer has moved onto other things and will no longer be supporting our website. This left us with the need to recreate our website. We decided to design, create, and maintain our website on our own! It has been an interesting experience to say the least, but we have been able to learn a lot and change many things. We hope all these changes will be for the better! So please bear with us as we embark on this next step of our adventure.

Thursday, March 31, 2016

Free simple baby blanket pattern

We at Mckay Manor Musers love a simple project with a purpose. Nothing fulfills those requirements like a baby blanket. You can easily start and finish a sweet little baby blanket in a matter of hours. Plus, you have an excuse to buy absolutely adorable fabrics that you may not have a use for otherwise. (As though we really need an excuse to buy more fabric.) This downloadable pattern will walk you through the steps of making a 30" x 40" baby blanket with a cotton binding. This blanket is incredibly customizable. Simply pick three of your favorite fabrics for the front, back, and binding. Then, add some fun quilting and a happy little applique. We have even included a few of our favorite painter's tape quilting designs.
The applique designs aren't included in the free pattern but you can buy them separately on our website if you so desire. If you would like to download the free pattern, just click here: download pattern
This will take you to a page where you should be able to see a preview of the pattern. Then, simply click on the image of the arrow pointing down to save it to your computer. 


Wednesday, February 17, 2016

Joining "quilt as you go" blocks with sashing

We get lots of questions about our "quilt as you go" patterns. When people get to the step where we have you join the blocks with sashing, they tend to get concerned that we did our math wrong. It's not that it's impossible for us to have done the math wrong. That has been known to happen but in this case, we promise the math is right. :) Hopefully the following tutorial will help alleviate your fears in this regard.

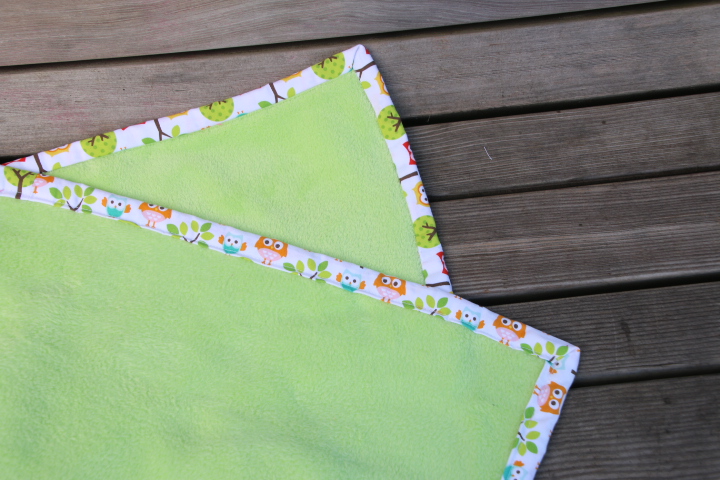
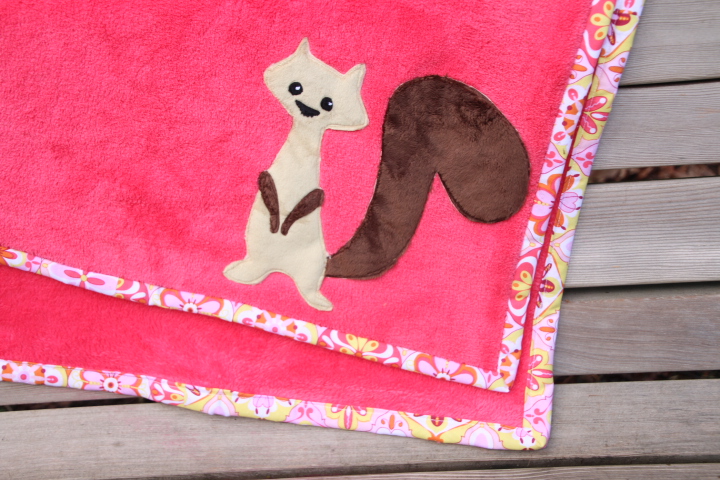
To start, this is an example of one of our "quilt as you go" blankets. This is block blanket one, which is the background for Forest Friends, Safari Shindig, Tricks and Treats, Gobble 'till ya Wobble, and Joy to the World. But the method is the same for any blanket that uses block blanket 2 or the building blocks pattern.
For the purposes of the tutorial we are going to focus on the three blocks that make up the center of the quilt: 
The pattern will tell you to join the 15" x 7" yellow striped block to the 15" x 19" pink lattice block using a 15" x 2" piece of sashing. Then it has you join these blocks to the 22" x 26" blue block using a 2" x 26" piece of sashing. This is where people get worried, because they see that 7+19 = 26 and it seems like we forgot to account for the 2 inches of sashing. Well, worry not friends. I will now attempt to explain why this will all work out.
First, you will attach the 2" piece of sashing to the yellow striped block using a 1/2" seam allowance. When you flip the sashing down it will hang out over the edge of the yellow striped block by 1". (There will be 1 1/2 inches of sashing showing but 1/2 inch of it is sitting on top of the seam allowance.) Next, you will lay the yellow and white striped block on top of the pink lattice block (with right sides together) and join them with a 1/2" seam allowance. When you flip the yellow striped block up the total height will be 26". Behind the 1" piece of sashing that is showing there is 1" worth of seam allowances. 1/2" from the pink lattice block and 1/2" from the yellow striped block. Thus, the blocks are actually butted up next to each other behind the sashing and there was no gain or loss in the respective heights of the original blocks. 

Now there is no need to worry when attempting to join these two blocks to the 22" x 26" blue block using the 2" x 26" piece of sashing. 
The same theory as above applies here. When you sew the sashing to the blue block with a 1/2" seam allowance the total width will increase by 1". Then, when you attach the yellow striped/pink lattice block with another 1/2" seam allowance the total width will be 37 inches. 

Thursday, February 11, 2016

Free Winter Placemat Pattern

We have yet another free pattern! This one is for an adorable winter placemat with a cute little snowman applique. The steps are super easy to follow and it uses our simple sew and flip method of construction. The best part? Once you know the method you can use any fabric and change out the applique so you have a placemat for any occasion.
 
The pattern is set up in our traditional downloadable style that is specifically designed to print out nicely on your home printer. 
If you would like to download the free pattern (with the pattern pieces for the applique) just click here: download pattern
This will take you to a page where you should be able to see a preview of the pattern. Then, simply click on the image of the arrow pointing down to save the pattern to your computer. 
Enjoy and thanks for stopping by!

Friday, October 23, 2015

Free Fleece Hat Pattern

We decided one new pattern just wasn't enough. This is just the second in a set of three free patterns, so keep watching for the third one to pop up!
This adorable hat pattern is perfect for the little ones in your life! It has a happy little owl face and a fleece lining. What could be better on a chilly day? You don't need a lot of time or fabric to throw together one of these hats, but you are sure to get lots of smiles!
If you would like to download the free pattern (with the pattern pieces) just click here: download pattern
This will take you to a page where you should be able to see a preview of the pattern. Then, simply click on the image of the arrow pointing down to save the pattern to your computer. 
Enjoy! And thanks for stopping by!

Free Starfish Stuffed Animal Pattern

Yep, we're pretty bad about keeping this blog up to date. But as Quilt Market in Houston Texas rolls around yet again so does another free pattern! Two of our new quilts are focused on the ocean: Pirate Posse and Mermaid Marina. We decided that it would be fun to give away a free pattern to go along with these two new quilts.
With our "sew and flip" and "quilt as you go" methods these quilts go together surprising quickly.  You build one block at a time and quilt it before placing the appliques. Then, you sew your applique onto one small block instead of trying to fit your whole quilt in your machine. 
So. Much. Easier.
And, when you are done with your quilt top, you are all done quilting (if you want to be). Then you just need to add a backing and binding using whatever method you are most comfortable with and your quilt is all ready for snuggling. (We do have a free pattern with our binding method as well.) 
Now, on to the real reason you are here: the free pattern! 
If you would like to download the free pattern, just click here: download pattern
This will take you to a page where you should be able to see a preview of the pattern. Then simply click on the image of the arrow pointing down to save it to your computer. 
Enjoy! 

Thursday, January 29, 2015

Cotton bound fleece blanket free pattern

Clearly, our goal to be better about updating our blog was a miserable failure. But, we have yet another free pattern for you! And this time it's all about binding.
cotton binding downloadable cover 
In the past, we have done just about anything to avoid putting bindings on our blankets. Hence the Textured Edge Throw blanket pattern and the So Soft So Simple Throw pattern. Both patterns provide a way of joining a blanket front to back quickly and easily without the use of a binding. The textured edge throw pattern uses an interestingly textured piece of fabric sandwiched between the front and back to join your blanket. It's quick and easy and is one of our favorite methods of making a simple blanket.
textured edge throw pattern
The so soft so simple throw pattern is designed to create self-mitering corners by having the backing fabric wrap around to the front. This is the method we use most often when attaching the backings to our block blanket quilt fronts. 
self mitered corner
While it works great for adding a backing to a quilt front, we think this method also makes for very pretty blanket by simply using two beautifully patterned fabrics.        
cotton bound fleece blanket
However, we recently discovered a method of machine binding that we are pretty darn excited about. Although we continue to love the previous two methods we can't deny that this new binding technique opens up some new and exciting options! One of which is making incredibly quick and easy baby blankets which require no hand sewing.
cotton bound fleece blanket with cute applique

It also makes adding a silk binding to a simple fleece blanket almost enjoyable. Check it out for yourself if you don't believe us!
machine bound baby blanket using silk
We want to share our excitement with you in the form of a free pattern. The applique designs aren't included in the free pattern but you can buy them separately on our website if you so desire. If you would like to download the free pattern just click here: download pattern.
This will take you to a page where you should be able to see a preview of the pattern. Then simply click on the image of the arrow pointing down to save it to your computer.